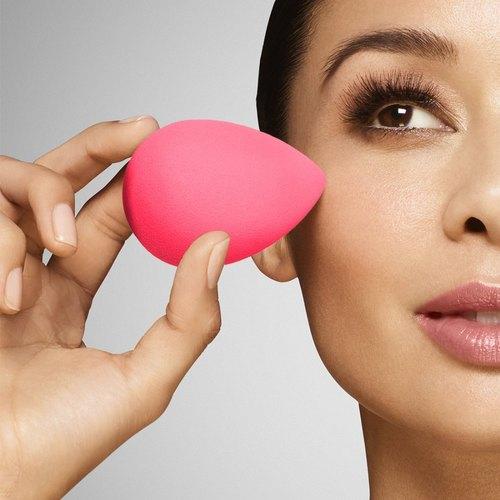
How to Clean a Beauty Blender? If you use a BeautyBlender or make-up sponge to apply your makeup, you may be aware of the importance of cleaning them regularly. As these tools are porous and designed to be used damp, they can easily harbor bacteria, leading to breakouts or skin irritation if not cleaned properly. In this article, we will discuss the best ways to clean your BeautyBlender or make-up sponge, including some hacks and tricks that can save you time and effort.
Why clean a makeup sponge?
Makeup sponges, like any other beauty tool, need to be cleaned regularly to avoid the buildup of bacteria and other harmful organisms that can cause skin issues. When you use your makeup sponge repeatedly without cleaning it, you are essentially transferring bacteria, dead skin cells, and old makeup onto your skin, which can lead to clogged pores, breakouts, and even skin infections. Regularly cleaning your makeup sponge helps to ensure that it stays hygienic and free from harmful organisms, thus keeping your skin healthy and clear.
Read also: How long does hair have to be to wax?
What are the cleaning methods for the Beauty Blender?
Method 1
Cleaning the sponge with shampoo and water
It’s recommended to clean your sponges after every use, or at least weekly, to ensure that they stay hygienic. One easy method is to use baby shampoo and warm water. Simply massage the shampoo into the sponge and keep squeezing it until the water runs clear.
Don’t wring or twist the sponge: This can damage the sponge and cause it to lose its shape. Instead, gently squeeze out the excess water after rinsing.
Air dry the sponge: After cleaning, allow the sponge to air dry completely before using it again. Avoid using a hair dryer or other heat sources, as this can damage the sponge.
Method 2
Cleaning the sponge with oil
Using oil to clean your makeup sponge is a great technique for removing stubborn makeup and oil-based products that may not come off easily with soap and water alone. Applying a cleansing oil like coconut oil to a dry sponge can help break down these oils and make them easier to remove.
After applying the oil, you should follow up with the standard soap and water rinse to ensure that any remaining oily residue is removed from the sponge. This double cleansing technique can help ensure that your sponge is thoroughly cleaned and free from any bacteria or leftover makeup residue.
When choosing an oil to use for this technique, it’s important to opt for a high-quality, cold-pressed oil that is free from any additives or fragrances that could irritate your skin. Olive oil can also be a good option, but be sure to choose one that is pure and free from any added ingredients.
By incorporating this technique into your regular makeup sponge cleaning routine, you can help ensure that your sponges stay clean and free from bacteria, which will help extend their lifespan and keep your skin looking healthy and radiant.
Method 3
Heating your sponge in the microwave
One of the most interesting cleaning hacks is microwaving your sponge. This technique involves submerging your sponge in a cup of water and washing up liquid or antibacterial hand soap. You can also add coconut oil or olive oil for extra softening. Microwave it for 60 seconds and squeeze out the excess water (be careful, it’ll be hot). This method can disinfect your sponge but may not remove stains completely.
Method 4
Cleaning the sponge with a soaking
Soaking your makeup sponge is a great way to deep clean it and remove stubborn stains. It’s important to use a gentle soap or cleaner and make sure the sponge is fully submerged in the water. Allowing the sponge to soak for two to three hours will give the soap enough time to break down any makeup residue or stains.
After soaking, you can rinse and wring out the sponge under running water. Be sure to gently squeeze out any excess water and let the sponge air dry completely before using it again. By following these steps, you can help ensure that your makeup sponge stays clean and free from bacteria, which will help extend its lifespan and keep your skin looking healthy and radiant.
Method 5
Invest in a targeted cleaner
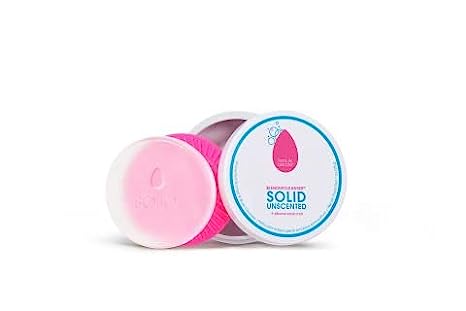
However, if you want to invest in a targeted cleaner that will save you money in the long run, it’s worth trying the BeautyBlender Cleanser Solid or the Clean-n-Fresh Makeup Brush Cleaner, which are both effective for deep cleaning.
For a liquid option, the BeautyBlender Liquid Blendercleanser is a great choice. It’s also important to note that the BeautyBlender brand recommends replacing your sponge every three months, even if you clean it properly.
Read also: Are stand up tanning beds better , Best 7 Tips Guide
How to properly store the BeautyBlender?
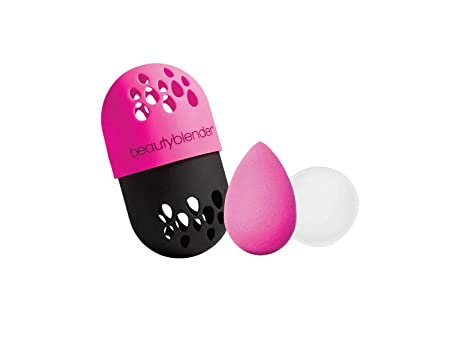
Storing your BeautyBlender or make-up sponge properly is just as important as cleaning it regularly. Always leave it to air dry a little before storing it to avoid bacterial growth and mold. You can store it in a mesh bag or targeted case that will keep it ventilated. The BeautyBlender Blender Defender Silicone Case fits two damp sponges and is a great option.
Read also: Why does my foundation separate on my face , 10 Best Tips & Tricks
In conclusion, taking care of your BeautyBlender or make-up sponge is crucial to maintaining a healthy complexion and achieving a flawless makeup application. Regular cleaning, proper storage, and using the right products are essential to keeping your sponges hygienic and long-lasting. With these tips and tricks, you can keep your BeautyBlender or make-up sponge in top condition and enjoy a more effective and enjoyable makeup routine.


